Difference between revisions of "Getting Started"
| (6 intermediate revisions by 2 users not shown) | |||
| Line 1: | Line 1: | ||
== Prerequisites == | == Prerequisites == | ||
| + | === JFed Account === | ||
To access the CityLab testbed you need: | To access the CityLab testbed you need: | ||
| − | * A | + | * A [https://portal.fed4fire.eu JFed account]. If you do not have one already, you will have to request one. How this is done is explained [https://doc.fed4fire.eu/getanaccount.html here]. |
| − | * You must be a member of the | + | * You must be a member of a JFed-project that is authorised to run experiments on the Citylab testbed. |
| − | + | If you join a JFed-project that has already been authorised, you will automatically also be granted access to the Citylab testbed. If you create a new JFed-project for your experiments, you can request for it to be authorised by sending an e-mail to {{SafeMailTo|admin|lab.cityofthings.eu}}, explaining why your projects need access to the testbed. Once your project has been authorised, any new members you add to your project will automatically also be granted access. | |
| − | + | Please note that if you create a new JFed-project during signup both the application for a jFed account as well as the authorisation of your JFed-project must be approved. The Citylab administrators are '''not''' automatically notified of the fact that you created a new project. You have to ask for it to be authorised yourself by sending an e-mail to {{SafeMailTo|admin|lab.cityofthings.eu}}. As long as you did not receive confirmation of both approvals, you are not ready to start using the testbed. | |
| − | |||
| − | === | + | === JFed Software === |
| − | You also need to have the JFed software installed on your computer. You can do this before or after you create your JFed account. Go to [https://jfed.ilabt.imec.be https://jfed.ilabt.imec.be] and download the appropriate installer for your operating system. On that website, you can also find some documentation on how to use this software (e.g. regarding certificates). | + | You also need to have the JFed software installed on your computer. You can do this before or after you create your JFed account. Go to [https://jfed.ilabt.imec.be/downloads/ https://jfed.ilabt.imec.be/downloads/] and download the appropriate installer for your operating system. On that website, you can also find some documentation on how to use this software (e.g. regarding certificates). |
== Using the testbed for the first time == | == Using the testbed for the first time == | ||
| Line 18: | Line 18: | ||
* Fire up jFed. If all goes well, you should be prompted to provide your User certificate and Password. Browse to the location where you stored the .pem-file (see jFed documentation regarding certificates), provide your password and click Login. | * Fire up jFed. If all goes well, you should be prompted to provide your User certificate and Password. Browse to the location where you stored the .pem-file (see jFed documentation regarding certificates), provide your password and click Login. | ||
[[File:jfed_login.png|Log in|480px]] | [[File:jfed_login.png|Log in|480px]] | ||
| − | |||
| − | |||
* Click on New | * Click on New | ||
* Drag in 3 wireless nodes. | * Drag in 3 wireless nodes. | ||
[[File:jfed_experiment.png|Drag in 3 wireless nodes|480px]] | [[File:jfed_experiment.png|Drag in 3 wireless nodes|480px]] | ||
* Configure which nodes you want to use: | * Configure which nodes you want to use: | ||
| − | ** Click the node, and select '' | + | ** Click the node, and select ''imec CityLab Antwerp''. By default, WiLab2 is selected. |
** Click on ''specific node''and select a node there. '''Make sure you check on the map to select nodes that are in reach of each other!''' The CityLab nodes can be far away from each other, so if you don't pay attention, you will end up with an experiment that does not support wireless communication between the selected nodes! See [[#Using the node map|using the node map]] for more information. | ** Click on ''specific node''and select a node there. '''Make sure you check on the map to select nodes that are in reach of each other!''' The CityLab nodes can be far away from each other, so if you don't pay attention, you will end up with an experiment that does not support wireless communication between the selected nodes! See [[#Using the node map|using the node map]] for more information. | ||
[[File:jfed_select_nodes.png|Select the appropriate nodes|480px]] | [[File:jfed_select_nodes.png|Select the appropriate nodes|480px]] | ||
| Line 79: | Line 77: | ||
Put the wireless interface into managed mode and start the wpa_supplicant tool to connect to the AP. | Put the wireless interface into managed mode and start the wpa_supplicant tool to connect to the AP. | ||
| − | < | + | |
| − | wpa_supplicant -iwlp1s0 -c/root/wpa_supplicant.conf</ | + | <code>iwconfig wlp1s0 mode managed</code> |
| + | |||
| + | <code>wpa_supplicant -iwlp1s0 -c/root/wpa_supplicant.conf</code> | ||
Open a second ssh terminal and specify an IP address for the wlp1s0 interface: | Open a second ssh terminal and specify an IP address for the wlp1s0 interface: | ||
| − | + | ||
| − | <code>ifconfig wlan0 192.168.X.Z/24 | + | <code>sudo su; ifconfig wlan0 192.168.X.Z/24</code> |
| + | |||
make sure Z is not 1 and is different on both stations. Now, check if you can ping from one station to the other. | make sure Z is not 1 and is different on both stations. Now, check if you can ping from one station to the other. | ||
| Line 99: | Line 100: | ||
== Troubleshooting == | == Troubleshooting == | ||
| − | |||
| − | |||
| − | |||
| − | |||
=== Working around connectivity issues === | === Working around connectivity issues === | ||
Revision as of 10:43, 8 April 2021
Prerequisites
JFed Account
To access the CityLab testbed you need:
- A JFed account. If you do not have one already, you will have to request one. How this is done is explained here.
- You must be a member of a JFed-project that is authorised to run experiments on the Citylab testbed.
If you join a JFed-project that has already been authorised, you will automatically also be granted access to the Citylab testbed. If you create a new JFed-project for your experiments, you can request for it to be authorised by sending an e-mail to , explaining why your projects need access to the testbed. Once your project has been authorised, any new members you add to your project will automatically also be granted access.
Please note that if you create a new JFed-project during signup both the application for a jFed account as well as the authorisation of your JFed-project must be approved. The Citylab administrators are not automatically notified of the fact that you created a new project. You have to ask for it to be authorised yourself by sending an e-mail to . As long as you did not receive confirmation of both approvals, you are not ready to start using the testbed.
JFed Software
You also need to have the JFed software installed on your computer. You can do this before or after you create your JFed account. Go to https://jfed.ilabt.imec.be/downloads/ and download the appropriate installer for your operating system. On that website, you can also find some documentation on how to use this software (e.g. regarding certificates).
Using the testbed for the first time
Create and activate your experiment using jFed
Follow these steps to activate your nodes using jFed:
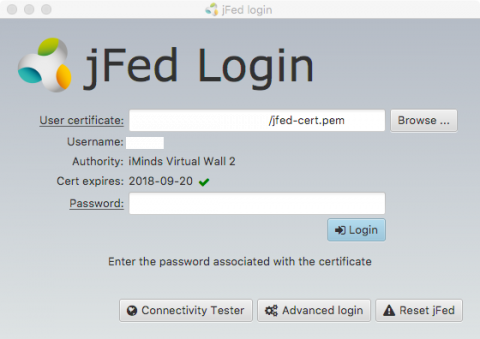
- Fire up jFed. If all goes well, you should be prompted to provide your User certificate and Password. Browse to the location where you stored the .pem-file (see jFed documentation regarding certificates), provide your password and click Login.
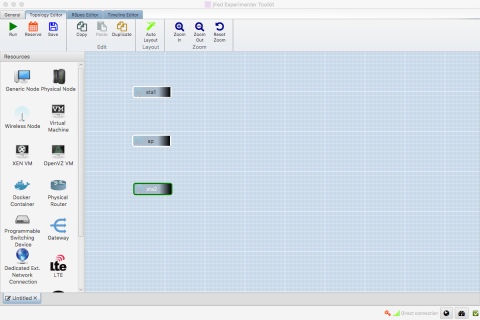
- Click on New
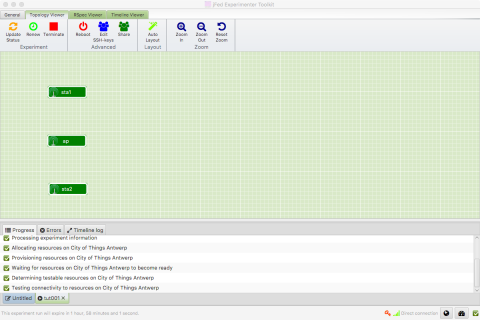
- Drag in 3 wireless nodes.
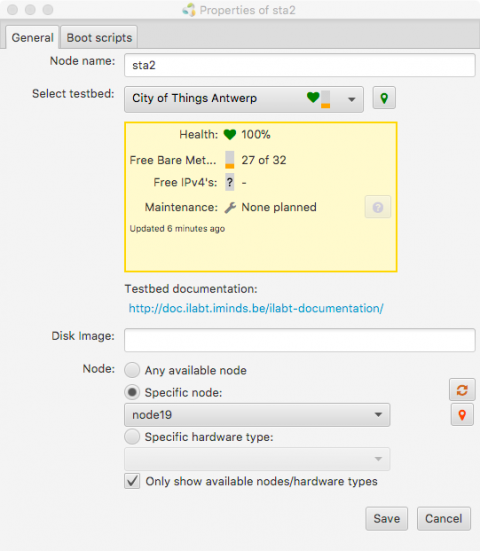
- Configure which nodes you want to use:
- Click the node, and select imec CityLab Antwerp. By default, WiLab2 is selected.
- Click on specific nodeand select a node there. Make sure you check on the map to select nodes that are in reach of each other! The CityLab nodes can be far away from each other, so if you don't pay attention, you will end up with an experiment that does not support wireless communication between the selected nodes! See using the node map for more information.
- Right click, Configure Node to change the properties (name/testbed/disk image/specific node).
- Name the three fixed nodes: ap and sta1 and sta2.
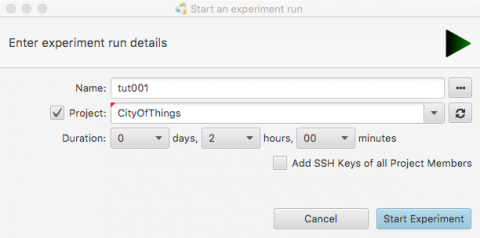
- Click Run to start your slice (Green arrow on the top left) and fill in a unique name for your slice.
- When all nodes turn green, your experiment is succesfully activated.
Configuration of Access Point
SSH to your AP node (double click it in jFed). Become root:
sudo su
Create a config file for the hostapd program:
nano /root/hostapd.conf
Add the following content to the config file:
interface=wlp1s0
driver=nl80211
country_code=BE
ssid=demoX
hw_mode=Z
channel=Y

auth_algs=1
wpa=2
wpa_passphrase=
wpa_key_mgmt=WPA-PSK
wpa_pairwise=TKIP
rsn_pairwise=CCMP
Replace X with a random number. Replace Y with your channel(1-11 for g, 36/40/44 for a), Z with the WiFi mode (a or g) and PWD with a secure password. Start hostapd. The above config will setup an AP on wlan0 using 802.11a or g, channel Y, with SSID demoX:
hostapd /root/hostapd.conf
Open a second ssh terminal and give an IP address to the wlp1s0 interface so we can test the connection to the clients (in the next steps). Be sure to replace X with your number:
sudo su; ifconfig wlp1s0 192.168.X.1/24
Configuration of stations
For each of the two stations, open a ssh terminal and become root:
sudo su
Create a config file for the wpa_supplicant program:
wpa_passphrase demoX PWD >/root/wpa_supplicant.conf
In the above command replace demoX and PWD with the SSID and WPA2 password you configured in the hostapd.conf file on the access point.
Put the wireless interface into managed mode and start the wpa_supplicant tool to connect to the AP.
iwconfig wlp1s0 mode managed
wpa_supplicant -iwlp1s0 -c/root/wpa_supplicant.conf
Open a second ssh terminal and specify an IP address for the wlp1s0 interface:
sudo su; ifconfig wlan0 192.168.X.Z/24
make sure Z is not 1 and is different on both stations. Now, check if you can ping from one station to the other.
Using the node map
Note: A full-screen version of the node map can be found here The node map is a city map of Antwerp where all CityLab nodes in the City Center are marked (Zoom out for the nodes at Campus CMI). Every node is shown on the map by by a clickable pin. When you click on a pin, a small text balloon opens that contains a link that brings you to a web page with some more information on that node.
You can use the node map to search for nodes that are in each others vicinity in order to set up an experiment with nodes that can actually communicate with the technology you will use. Due to the scale of the CityLab testbed, not all nodes can directly communicate with each other.
Please not that, while on the map, nodes might appear to be in close proximity, they do not necessarily have wireless connectivity (e.g. because there are obstacles blocking the line-of-sight between them). This is also highly dependent on technology. To help you select which nodes might be suitable for your experiment, we created an overlay on the map that shows which nodes have a direct connection with each other. To view this overlay, first select a type of wireless link from the drop-down menu. Then, you can optionally set filters based on RSSI values or on reliability. When you click the update button, the overlay will appear.
The overlay consists of colour-coded lines that give a visual clue of how good or bad a certain wireless link is. The lines themselves are also clickable, showing you the details of the link conditions. Do note that these figures come from a specially designed experiment to measure the link conditions. As these link conditions are also affected by external factors, they might change. You may also notice that some nodes appear not to have any links to any other nodes. This simply means that the link conditions have not been measured since this node was added. We do occasionally re-measure the link conditions but since we have to reserve all the nodes in the testbed for an entire weekend to do so, we don't want to do this too often. In essence: You can use this node map as a guide, but do not consider it to be absolute reality...
Troubleshooting
Working around connectivity issues
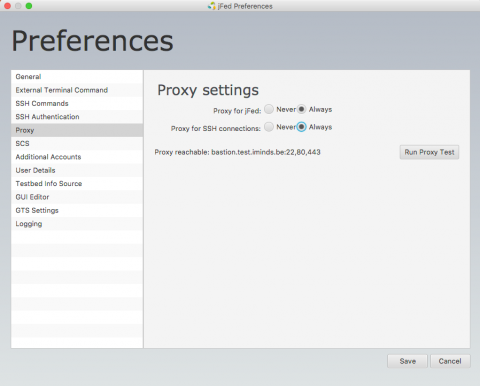
If you get a connection error while configuring the nodes or starting a test, your host network is probably blocking outgoing TCP connections to port 12369 (the Geni AM port). You can work around this by enabling the jFed Proxy. To do so, click on Preferences, select the Proxy tab and click Run Proxy Test. Select the Always option for both Proxy for jFed and Proxy for SSH connections.
